
The T-Bucket dashboard is another way in which you can exercise your creativity to build a T-Bucket that is not only different and beautiful, but also customized in its functionality just for you. Some T-Bucket dashboards may be sculpted and come built into the body or you may have a body where the T-Bucket dashboard is just a plain, flat fiberglass panel.
But, I think you’ll agree that Dave Melling‘s T-Bucket dash is decidedly different, and not just because of the British right-hand drive. 🙂

This photo shows the structure of the glove compartment whereby I made a vertical partition and put a shelf into place. There are two holes in the vertical partition through which the light dimmer and trip mileage reset switches protrude. Apart from that it is a pretty poor photo! 😉

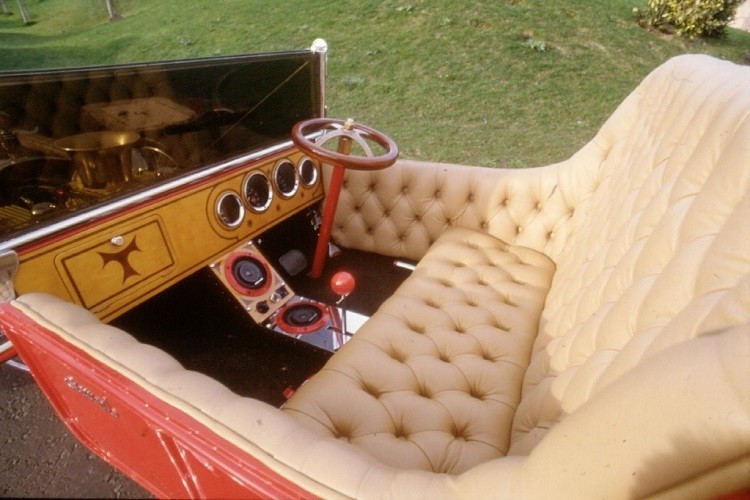
This is a shot of the interior from behind the car with the steering wheel and windscreen in place. I used a full-size snooker ball as the gear lever knob, and made my own shift mechanism to go beneath it; the mechanism was not installed at the time of this photo, however. You can just about see the brake pedal to the left of the steering column. I built the dashboard in a manner which strengthens the top of the fiberglass body to get around the weakness in this particular place. The windscreen rests across the top of the body immediately above the dashboard, but the majority of it’s weight is supported by the windscreen posts.

This photo of the interior shows the chrome surrounds of the instruments in place and the brake pedal stalk poking up through the floor. The floor of the body has undergone a fair amount of sanding down to smooth out the fiberglass resin ripples which existed. The three holes beneath the instrument surrounds would be used to house the indicator and ignition warning lights which are fitted into the wooden dashboard and wired through to the instrument panel.

The above photo shows the finished T-Bucket dashboard with the wood veneer and pinstriping applied and the center console. Look closely and somewhat hidden by the steering column you’ll note the accelerator pedal in the shape of the letters ’23T’.
As we continue, you’ll learn more about how Dave Melling built his custom T-Bucket interior, including the all-important upholstery insert.
TBucketPlans.com originated in 2005 as a personal blog extolling the virtues of T-Buckets. In 2009 I blogged about Chester Greenhalgh, the "how to" genius who wrote the legendary, out-of-print “How to Build a T-Bucket Roadster for Under $3000”. That led to a friendship with Chester and our partnership in marketing the updated eBook version of his T-Bucket building bible. The T-Bucket fire burns stronger and stronger.
- The Steve Scott Uncertain T – Resurrected! - January 24, 2024
- Uncertain T Exposed! - January 24, 2024
- Y-Block Ford T-Bucket: Ted Kramer’s Snoopy Inspires Me - February 11, 2023
Related Posts
- 10000
 How you go about your T-Bucket interior fabrication can make all the difference in the world in terms of your hot rod's overall appearance. In Chester Greenhalgh's "How to Build a T-Bucket" eBook we cover the simple basics of T-Bucket interior fabrication. But in Dave Melling's build he takes his…
 - 10000
 This installment wraps up coverage of the Jaguar independent rear suspension in Dave Melling's T-Bucket project. The treatment has been extensive because the Jaguar independent rear suspension can be the most dramatic element you can include when building a T-Bucket hot rod. We hope that by following along with these…
 - 10000
 This is where the hard work on Dave Melling's Jag rear axle assembly is starting to pay off. After replacing the early S-type Jag rear axle assembly with the wider Mk 10 Jag rear axle assembly and chroming just about everything Dave now starts to put it back together. The…