

One way to save a lot of money in a budget T-Bucket build is to fabricate your own T-Bucket upholstery insert. That’s what Dave Melling did and his home made T-Bucket upholstery insert formed the basis for his beautiful diamond button tuft upholstery.
Diamond button tuft upholstery, by the way, can be done at home without access to a sewing machine and we’ll have to do a how-to future on that in the future. For now, though, Dave details how he made his own T-Bucket upholstery insert.

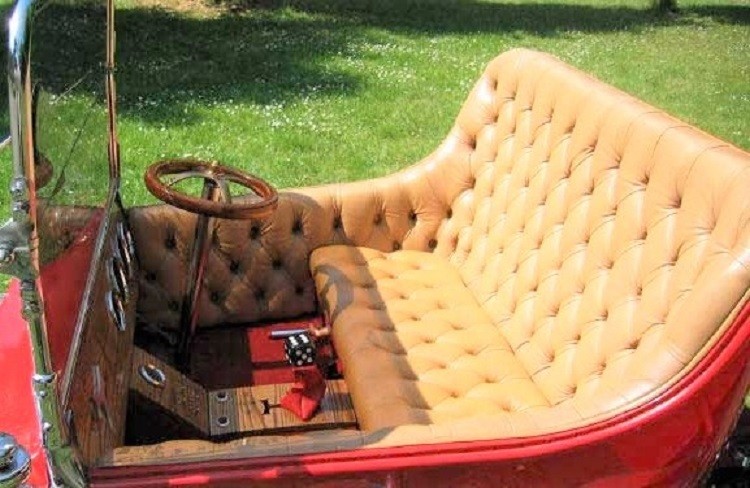
Yet another photo showing the construction of the body, this time with the seat in place. It proved necessary to cut the seat down around the edge which abuts the body, as the foam part of the upholstery required at least one inch clearance all around. The seat is just a sheet of half-inch plywood, fitted with 6 mm mild steel brackets to hold it in place. I had considered upholstering the interior in a number of different materials, the most likely one being Dralon [a European made fabric] as used in pubs, etc. because of its durable qualities. However, fate played its part and I was able to buy a whole hide of biscuit-coloured Connolly leather for only £40, thanks to a stall at the Essex Show in 1985. Despite the fact that the hide was 40 sq. ft. of leather, it actually proved to be insufficient to cover both the seat and the upholstery insert.

These photos show the stages of making the T-Bucket upholstery insert.

It is made from three thin sheets of hardboard [thin Lauan doorskin sheets], laminated together. It cost about £17 for the hardboard.

Having constructed the insert it was primed, undercoated and glassed to protect and harden it.

It is fitted to the body along the top edge by a series of wood-screws which screw into it from the outside, and also hold in place where it touches the floor of the body, by four little right angled feet which can be seen in the picture above of the T-Bucket set insert outside the body.

The T-Bucket seat insert was eventually painted to protect it prior to being upholstered.

This shot shows the back of the T-Bucket upholstery insert before it was fitted to the car. The holes, of course, correspond to the buttons in the upholstery.
In our next installment, you’ll learn about some rather typical details that have to be taken care of in preparing a T-Bucket body for paint.
TBucketPlans.com originated in 2005 as a personal blog extolling the virtues of T-Buckets. In 2009 I blogged about Chester Greenhalgh, the "how to" genius who wrote the legendary, out-of-print “How to Build a T-Bucket Roadster for Under $3000”. That led to a friendship with Chester and our partnership in marketing the updated eBook version of his T-Bucket building bible. The T-Bucket fire burns stronger and stronger.
- The Steve Scott Uncertain T – Resurrected! - January 24, 2024
- Uncertain T Exposed! - January 24, 2024
- Y-Block Ford T-Bucket: Ted Kramer’s Snoopy Inspires Me - February 11, 2023
Related Posts
- 10000
 How you go about your T-Bucket interior fabrication can make all the difference in the world in terms of your hot rod's overall appearance. In Chester Greenhalgh's "How to Build a T-Bucket" eBook we cover the simple basics of T-Bucket interior fabrication. But in Dave Melling's build he takes his…