

We’ve gotten some great feedback on this little series about how to build an opening T-Bucket door. While we can’t cover everything that’s included in the T-Bucket and Model A Hot Rod Modifications 2-DVD Set, our objective is that there’s more involved than grabbing a jigsaw and cutting out the door. By having an idea of what all is involved you’ll be prepared to make your own opening T-Bucket door with confidence. And you’ll have a door that looks right as well as works right.
So, Bob Hamilton continues on from Part 2 in this final opening T-Bucket door installment.
An Opening T-Bucket Door Done Right
“Now that the inner structure is complete, I needed to build out the area on the front of the door. Since it needed to be built out about 3/8ths of an inch in the hinge area, I cut a one by two and a short piece of 3/8th inch plywood and attached it with a sheet rock screw in the middle to act as the spacer.”
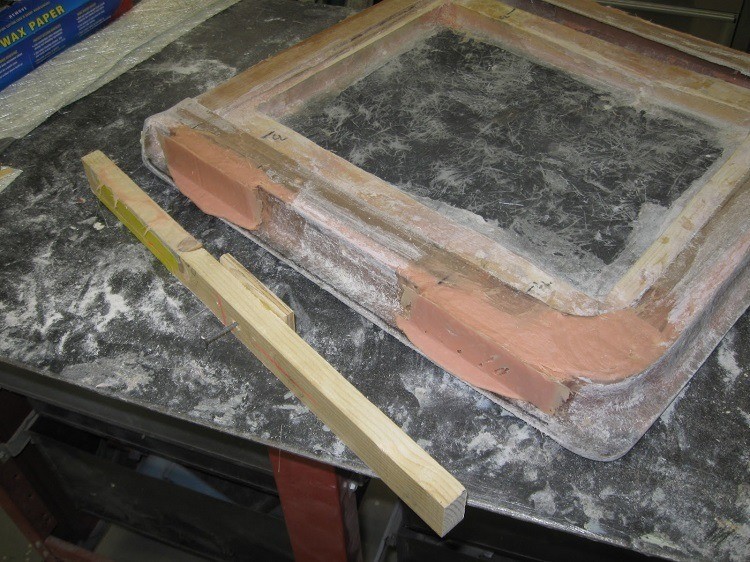
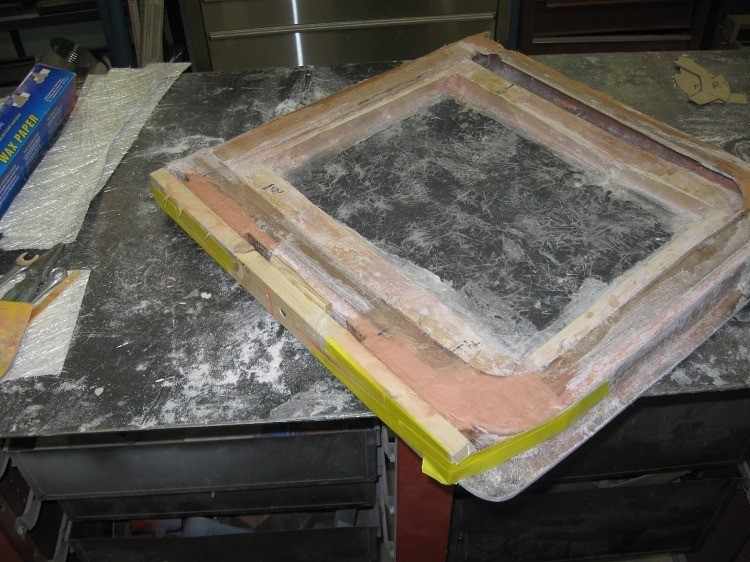
“This picture shows the spacer assembly held in place against the door with masking tape actually holding it to the door. Then I mixed up some fiberglass bondo (NOTE: fiberglass bondo is the shorthand term Bob uses for fiberglass reinforced body filler) and forced it between the door and the spacer, having first covered the one by two with wax paper to keep the bondo from sticking to the wood.”
“I determined where I wanted the latch mechanism to be located about 2 1/2 inches from the top of the door to the center of the latch. I then cut the opening using a carbide rotary file and cut the opening large enough for the latch to work (release). When that was complete, I lined up the latch and drilled the 1/4 inch mounting holes in the door. There was a small gap where the latch and the door came together and so I wrapped the latch with wax paper, mounted the latch to the door with 1/4 inch bolts and then forced fiberglass bondo in between the two. When it kicked, everything was removed and cleaned up and then reinstalled and final fit.”

“The picture below shows that the top ear needs to be cut off so that the latch will function without interference. A disc cutter was used for this purpose. The left latch is shown for comparison.”

“The following picture shows the way it all came out after the final fitting and cleanup. When it comes time to finish the door for primer and paint, I will use ultralight bondo to smooth everything up and detail the door.”

“The final picture shows the latch in place and everything working great. These are the medium bear claw style latches.”

This third installment on how to make an opening T-Bucket door just scratches the surface compared to the detail that Bob Hamilton shares in the T-Bucket and Model-A Hot Rod Mod’s DVD. For example, here’s what all that DVD covers just about fabricating an opening T-Bucket door:
- Why it’s important to have a plan before cutting doors out
- How “body stress” can be a problem when cutting the door out and how to avoid it
- Two ways to reinforce door and frame before cutting
- How to install “bear jaw” latches
- [thrive_highlight highlight=’#eeee22′ text=’dark’]How to use $5 hardware store hinges, rather than paying $50-$120 for special street rod hinges[/thrive_highlight]
- How to build reinforced door jambs that will look great and ensure smooth door operation
- Which side door you should always start with first
- How to lay out door outline before cutting and why pre-cuts will help
- Where your final cuts should be to avoid problems
- Which edge of the door is best to do your alignment from
- How to build up sheets and strips of fiberglass matte and resin to build your own door jambs for a finished look and durability
- How to plan ahead for easy upholstery panel mounting
- How to mount fiberglass strips around 90 degree curves
- Where to center your hinges in the door
- Where and how to mount the door latch
- How to modify a striker bolt to lengthen it and give longer life, smooth operation
- How to easily square a door edge that wasn’t cut perfectly straight
- How to build door upholstery panel mounting structure
- Why you should start saving your popsicle sticks
- How to reinforce the door for hinge mounting
- How to ensure precise top and bottom hinge alignment for smooth, dependable opening and closing
- How to tighten door gaps for that real “pro” look
- How to “bed” the hinges in fiberglass
- How to tighten or loosen hinge tension
- How to build door sills
- Optional ways of further strengthening door jambs, while also providing upholstery panel mounting
- How to most efficiently and effectively prime the interior door fiberglass work
You’ll be confident fabricating your own opening T-Bucket door when you follow the methodical and practical instruction Bob Hamilton shares about just how to do it in the comprehensive T-Bucket and Model A Hot Rod Modifications 2-DVD set. We’re proud to make these DVDs available through our sister website, StreetRodPlans.com.
- How to Put a Door in a T-Bucket, T-Bucket Doors that Open, Part 3 - September 4, 2018
- How to Put a Door in a T-Bucket, T-Bucket Doors that Open, Part 2 - August 31, 2018
- How to Put a Door in a T-Bucket, T-Bucket Doors that Open, Part 1 - August 13, 2018